Related Guides and Services
Related Guides
Services
Good painting is not just brushing color onto a wall. It is surface repair, product selection, clean protection, consistent texture, safe access, and a final walkthrough that catches small details before the customer does. If you want this handled by a crew instead of turning it into a weekend project, see our painting services in Provo and Utah County.
A Team Property Improvement handles interior painting, drywall repair, trim, prep, masking, and repaint planning in Provo, Orem, Springville, Spanish Fork, and surrounding Utah County areas. Send photos and project details to request an estimate.
Or keep reading to see the process we use on A Team paint jobs.
The Basic Painting Order
A clean paint job usually follows this sequence: inspect the room, repair drywall, sand and clean, protect floors and fixtures, spot-prime patches, cut in edges, roll full wall sections, apply the second coat, inspect in natural light, clean up, and complete a final walkthrough.
- Inspect the room
- Repair drywall and caulk gaps
- Sand, dust, and clean surfaces
- Protect floors, fixtures, and furniture
- Spot-prime patches and stains
- Cut in edges
- Roll full wall sections
- Apply the second coat as needed
- Inspect in natural light
- Clean up and complete the final walkthrough
For homes in Provo and Utah County, we pay extra attention to dry air, fast paint flash time, rental refresh durability, occupied-home cleanup, and drywall texture matching common in local homes, apartments, and basement finishes.
Module 1
Painting Fundamentals
Core Skills
- Drywall repair
- Understanding sheens
- Knowing what roller naps to use
- General interior painting knowledge
Key Takeaways
- The paint finish is only as good as the surface underneath it.
- Sheen changes how defects, touch-ups, and cleaning show up.
- Wrong nap length creates texture problems even with good paint.
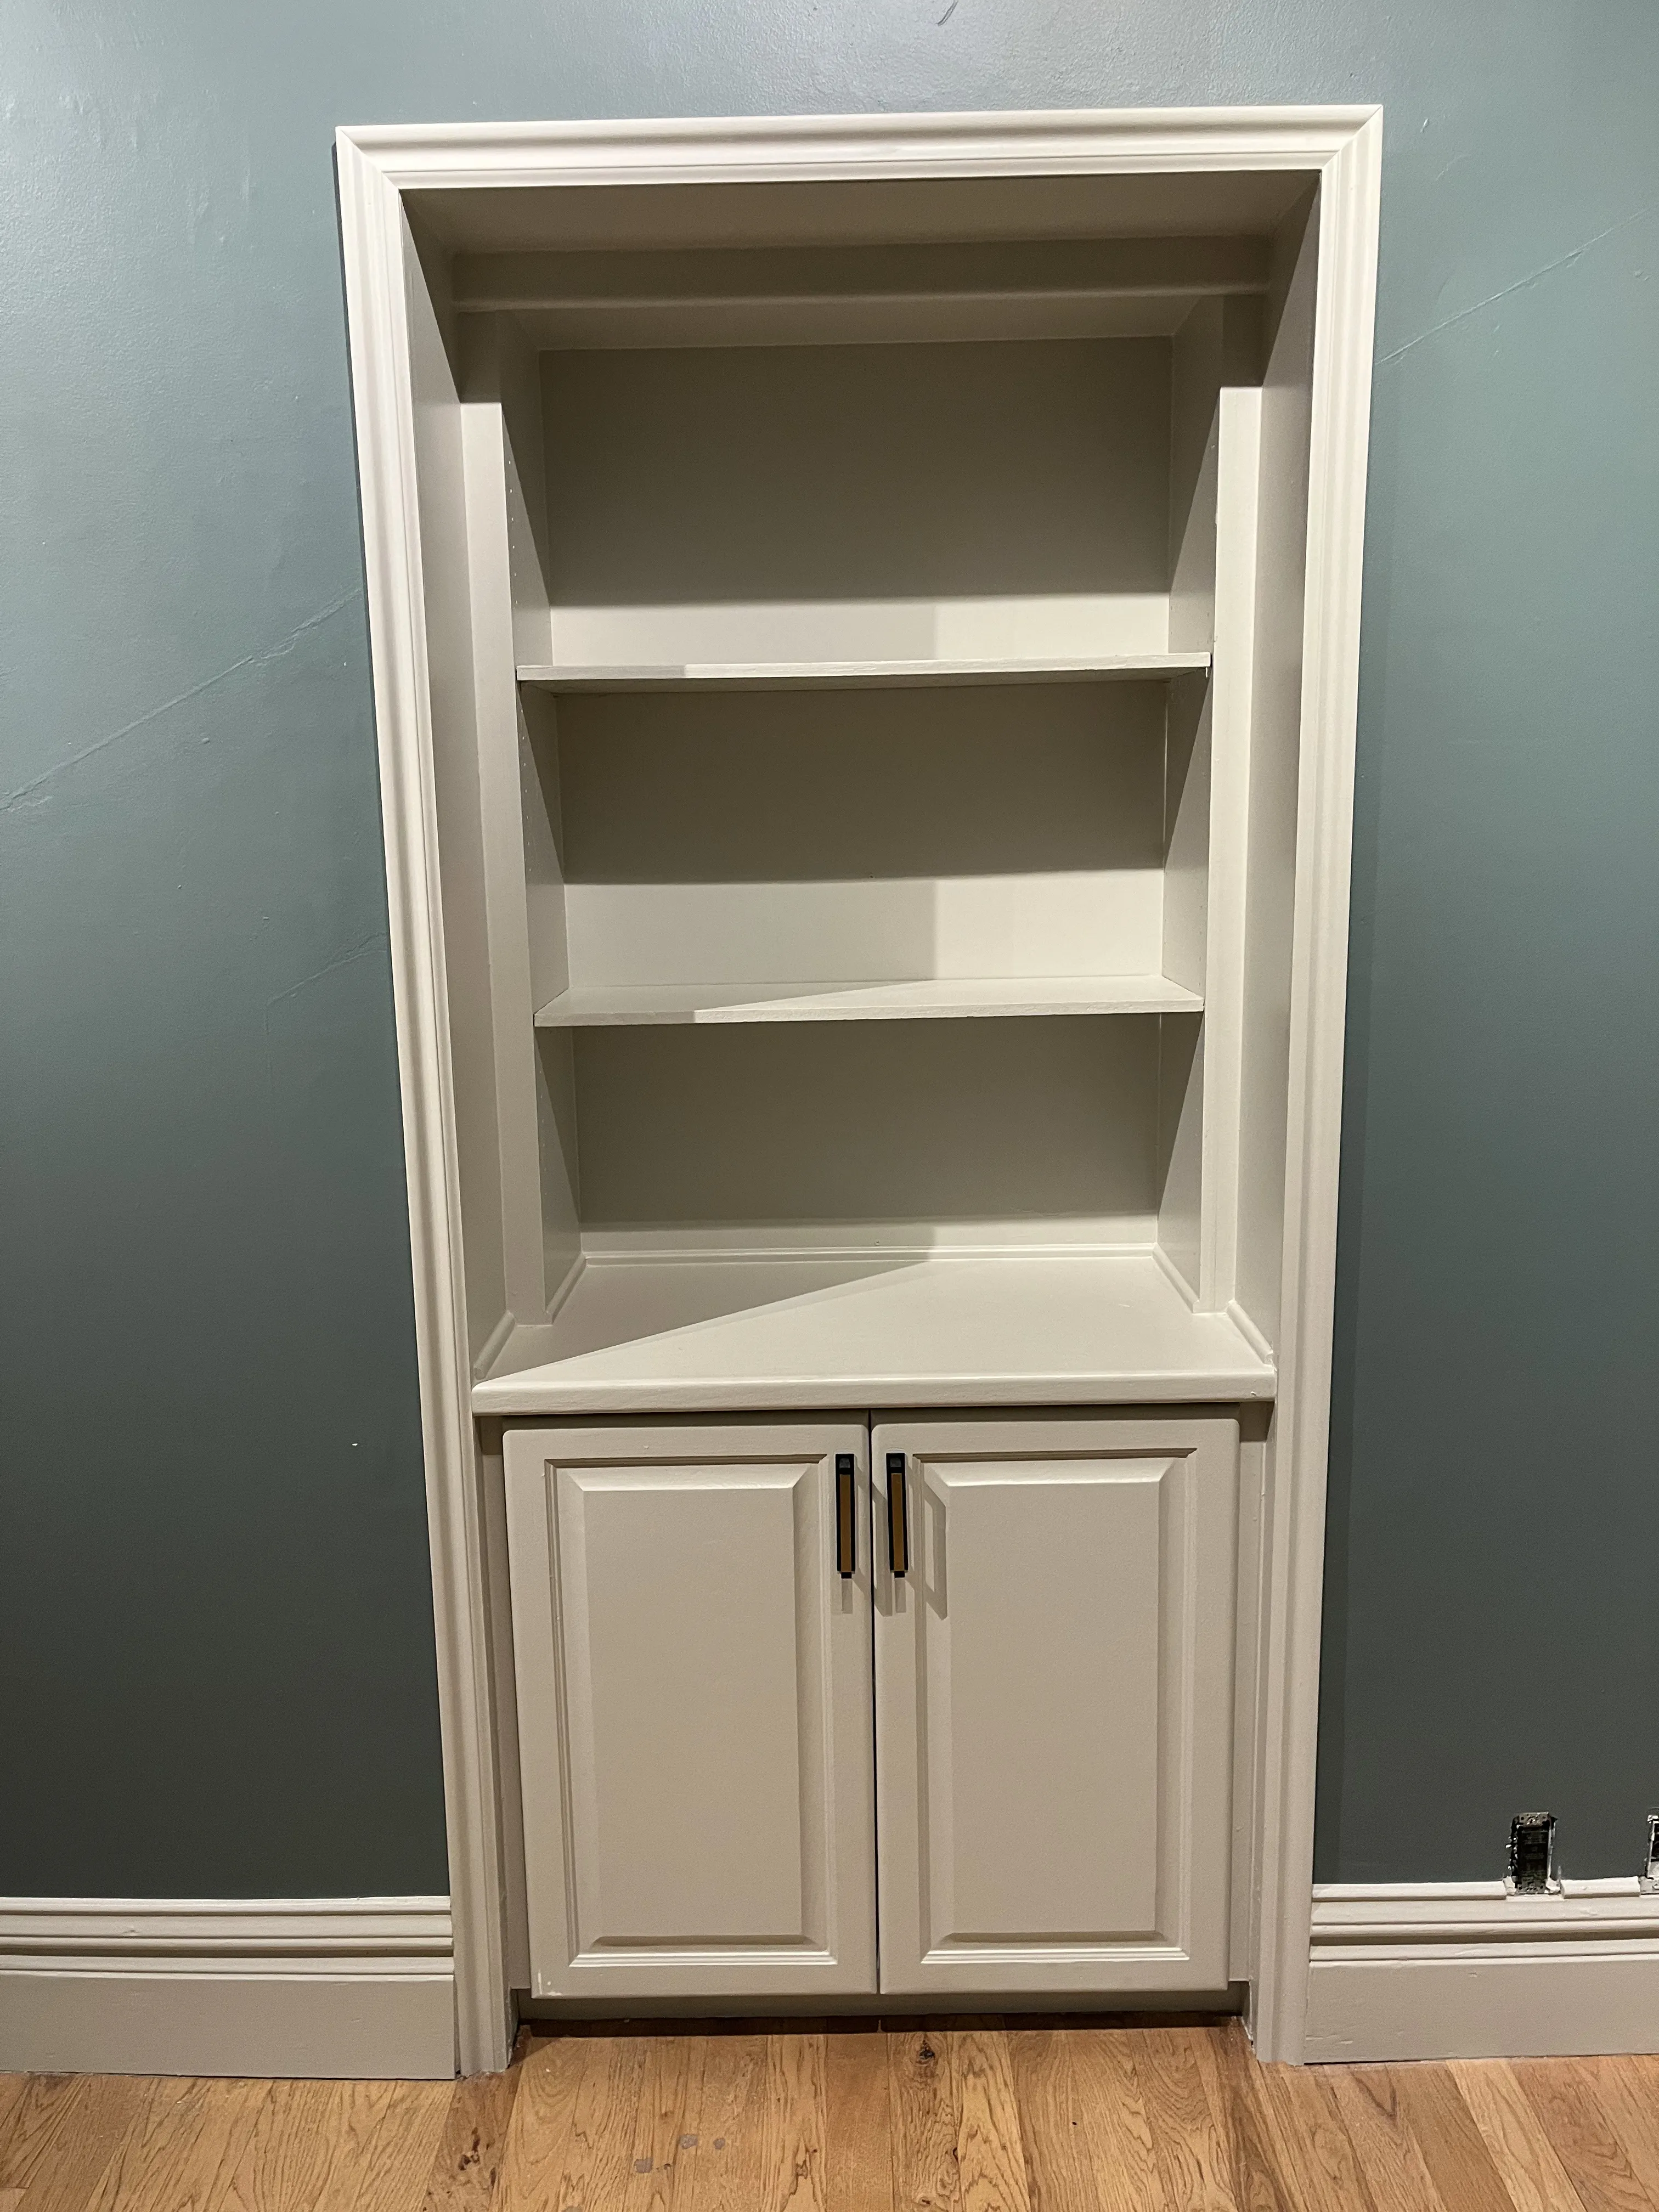
Start with the wall, not the color. A missed nail pop, dusty patch, or glossy unscuffed surface will still be visible after two coats. For A Team work, the first pass through a room is an inspection: mark damage, identify stains, decide where primer is required, and choose a paint system that matches the room. If the wall needs more than small patching, our drywall repair service is usually the right first step.
For homeowners, this is where a cheap paint job and a durable paint job usually separate. For crew members, this is where callbacks are prevented.
Sherwin-Williams Paint Selection
These are practical defaults, not a substitute for reading the label, checking the room conditions, and confirming the customer expectation. When in doubt, ask the paint store and test a small area before committing to a full wall. For a deeper product breakdown, read our guide on choosing the right paint quality level.
| Project | A Team Default | Why We Use It | Notes |
|---|---|---|---|
| Standard interior walls | SuperPaint Interior Acrylic Latex | Reliable everyday coverage for bedrooms, living rooms, hallways, and rental refreshes. | Use two coats for consistent color and sheen. |
| High-traffic walls | Duration Home Interior Acrylic Latex | Better washability for families, rentals, stairs, and busy hallways. | Choose matte or satin based on wall condition and cleaning needs. |
| Premium finish walls | Emerald Interior Acrylic Latex | Good choice when the customer wants upgraded coverage and a more refined finish. | Best for main living areas where final appearance matters. |
| Trim, doors, cabinets | Emerald Urethane Trim Enamel | Designed for a harder, smoother finish on trim, doors, and cabinets. | Prep and dry time matter. Do not treat it like normal wall paint. |
| New drywall or heavy patching | Quality drywall primer before finish paint | Seals porous compound so patched areas do not flash through the finish coat. | Prime patches, then inspect with side lighting before painting. |
Paint Sheens and Where They Belong
| Sheen | Best Uses | Strengths | Tradeoffs |
|---|---|---|---|
| Flat | Ceilings, low-traffic bedrooms, imperfect walls | Hides drywall flaws and reduces glare. | Least washable and easier to mark. |
| Matte | Bedrooms, living rooms, smoother walls | Soft look with better performance than basic flat in many product lines. | Still less washable than higher sheens. |
| Eggshell / Satin | Hallways, kitchens, bathrooms, family spaces | Good balance of cleanability and appearance. | Shows more wall defects than matte. |
| Semi-gloss | Baseboards, doors, trim, moisture-prone accents | Durable, washable, and visually separates trim from walls. | Highlights dents, sanding scratches, and brush marks. |
| Gloss | Specialty accents only | Maximum shine and wipeability. | Requires excellent prep because every defect shows. |
Drywall Repair
Watch for how the repair is feathered wider than the damaged area so the patch disappears after primer and paint.
Understanding Paint Sheens
Focus on how sheen affects glare, cleanability, touch-ups, and how visible wall defects become.
Paint Roller Nap
Pay attention to how nap length changes coverage, texture, and how much paint the roller carries.
Interior Painting Overview
Watch the full room sequence so prep, cutting, rolling, and cleanup make sense as one workflow.
Module 2
Roller and Brush Techniques
Core Skills
- Cutting in with a brush
- Rolling evenly
- Avoiding roller marks
- Maintaining consistent texture
- Blending rolled sections
- Rolling near ceilings and trim
Key Takeaways
- Keep a wet edge and finish full wall sections whenever possible.
- Do not press a dry roller into the wall to stretch paint.
- Brush lines and roller texture should blend before the paint starts setting.
Brush and roller work should look like one continuous finish. Cut in a manageable section, then roll close enough to blend the brushed border without hitting trim or ceiling. On dry Utah days, large rooms can flash quickly, so do not cut the entire room and then roll unless the conditions and paint allow it. For a full room sequence, compare this module with our proper room painting technique guide.
The A Team standard is simple: no heavy edge picture-framing, no roller holidays, no dry lap marks, and no visible stop-start pattern under natural light.
Roller Nap Length
| Nap | Surface | Typical Use | Watch For |
|---|---|---|---|
| 1/4 inch | Very smooth doors, cabinets, fine trim panels | Thin, smooth application when texture must stay minimal. | Can starve walls of paint if used on normal drywall. |
| 3/8 inch | Smooth to lightly textured drywall | Default for many interior walls. | Keep the roller loaded so pressure does not create marks. |
| 1/2 inch | Light orange peel, older walls, mild texture | Better coverage into texture without forcing the roller. | Back roll evenly to avoid heavy stipple. |
| 3/4 inch | Heavy texture, masonry, rough exterior surfaces | Holds more paint and reaches deeper surface profiles. | Can leave too much texture on smooth walls. |
| 1 inch+ | Stucco, brick, block, very rough surfaces | Specialty use for rough exterior or masonry work. | Messier, slower, and not for finished interiors. |
Rolling Technique
Watch how the roller stays loaded, overlaps each pass, and avoids dry pressure marks.
Cutting In
Focus on brush loading, hand position, and keeping the line clean without overworking the paint.
Straight Paint Lines
Watch how tape, caulk, pressure, and removal timing affect the final edge.
Module 3
Using a Paint Sprayer
Core Skills
- Airless sprayer setup
- Pressure adjustment
- Spray patterns
- Spray overlap
- Preventing overspray
- Masking for spraying
- Sprayer cleanup
Key Takeaways
- Sprayers save time only when masking, setup, and cleanup are done correctly.
- Pressure should be only high enough to create a clean fan pattern.
- Overspray control is part of professionalism, not an optional cleanup step.
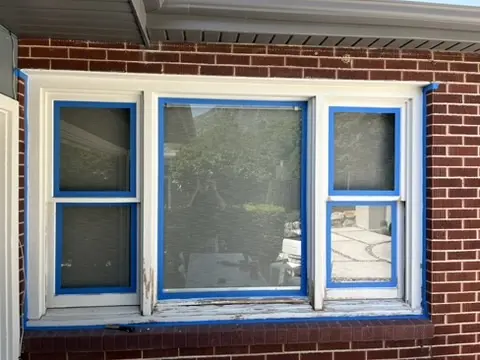
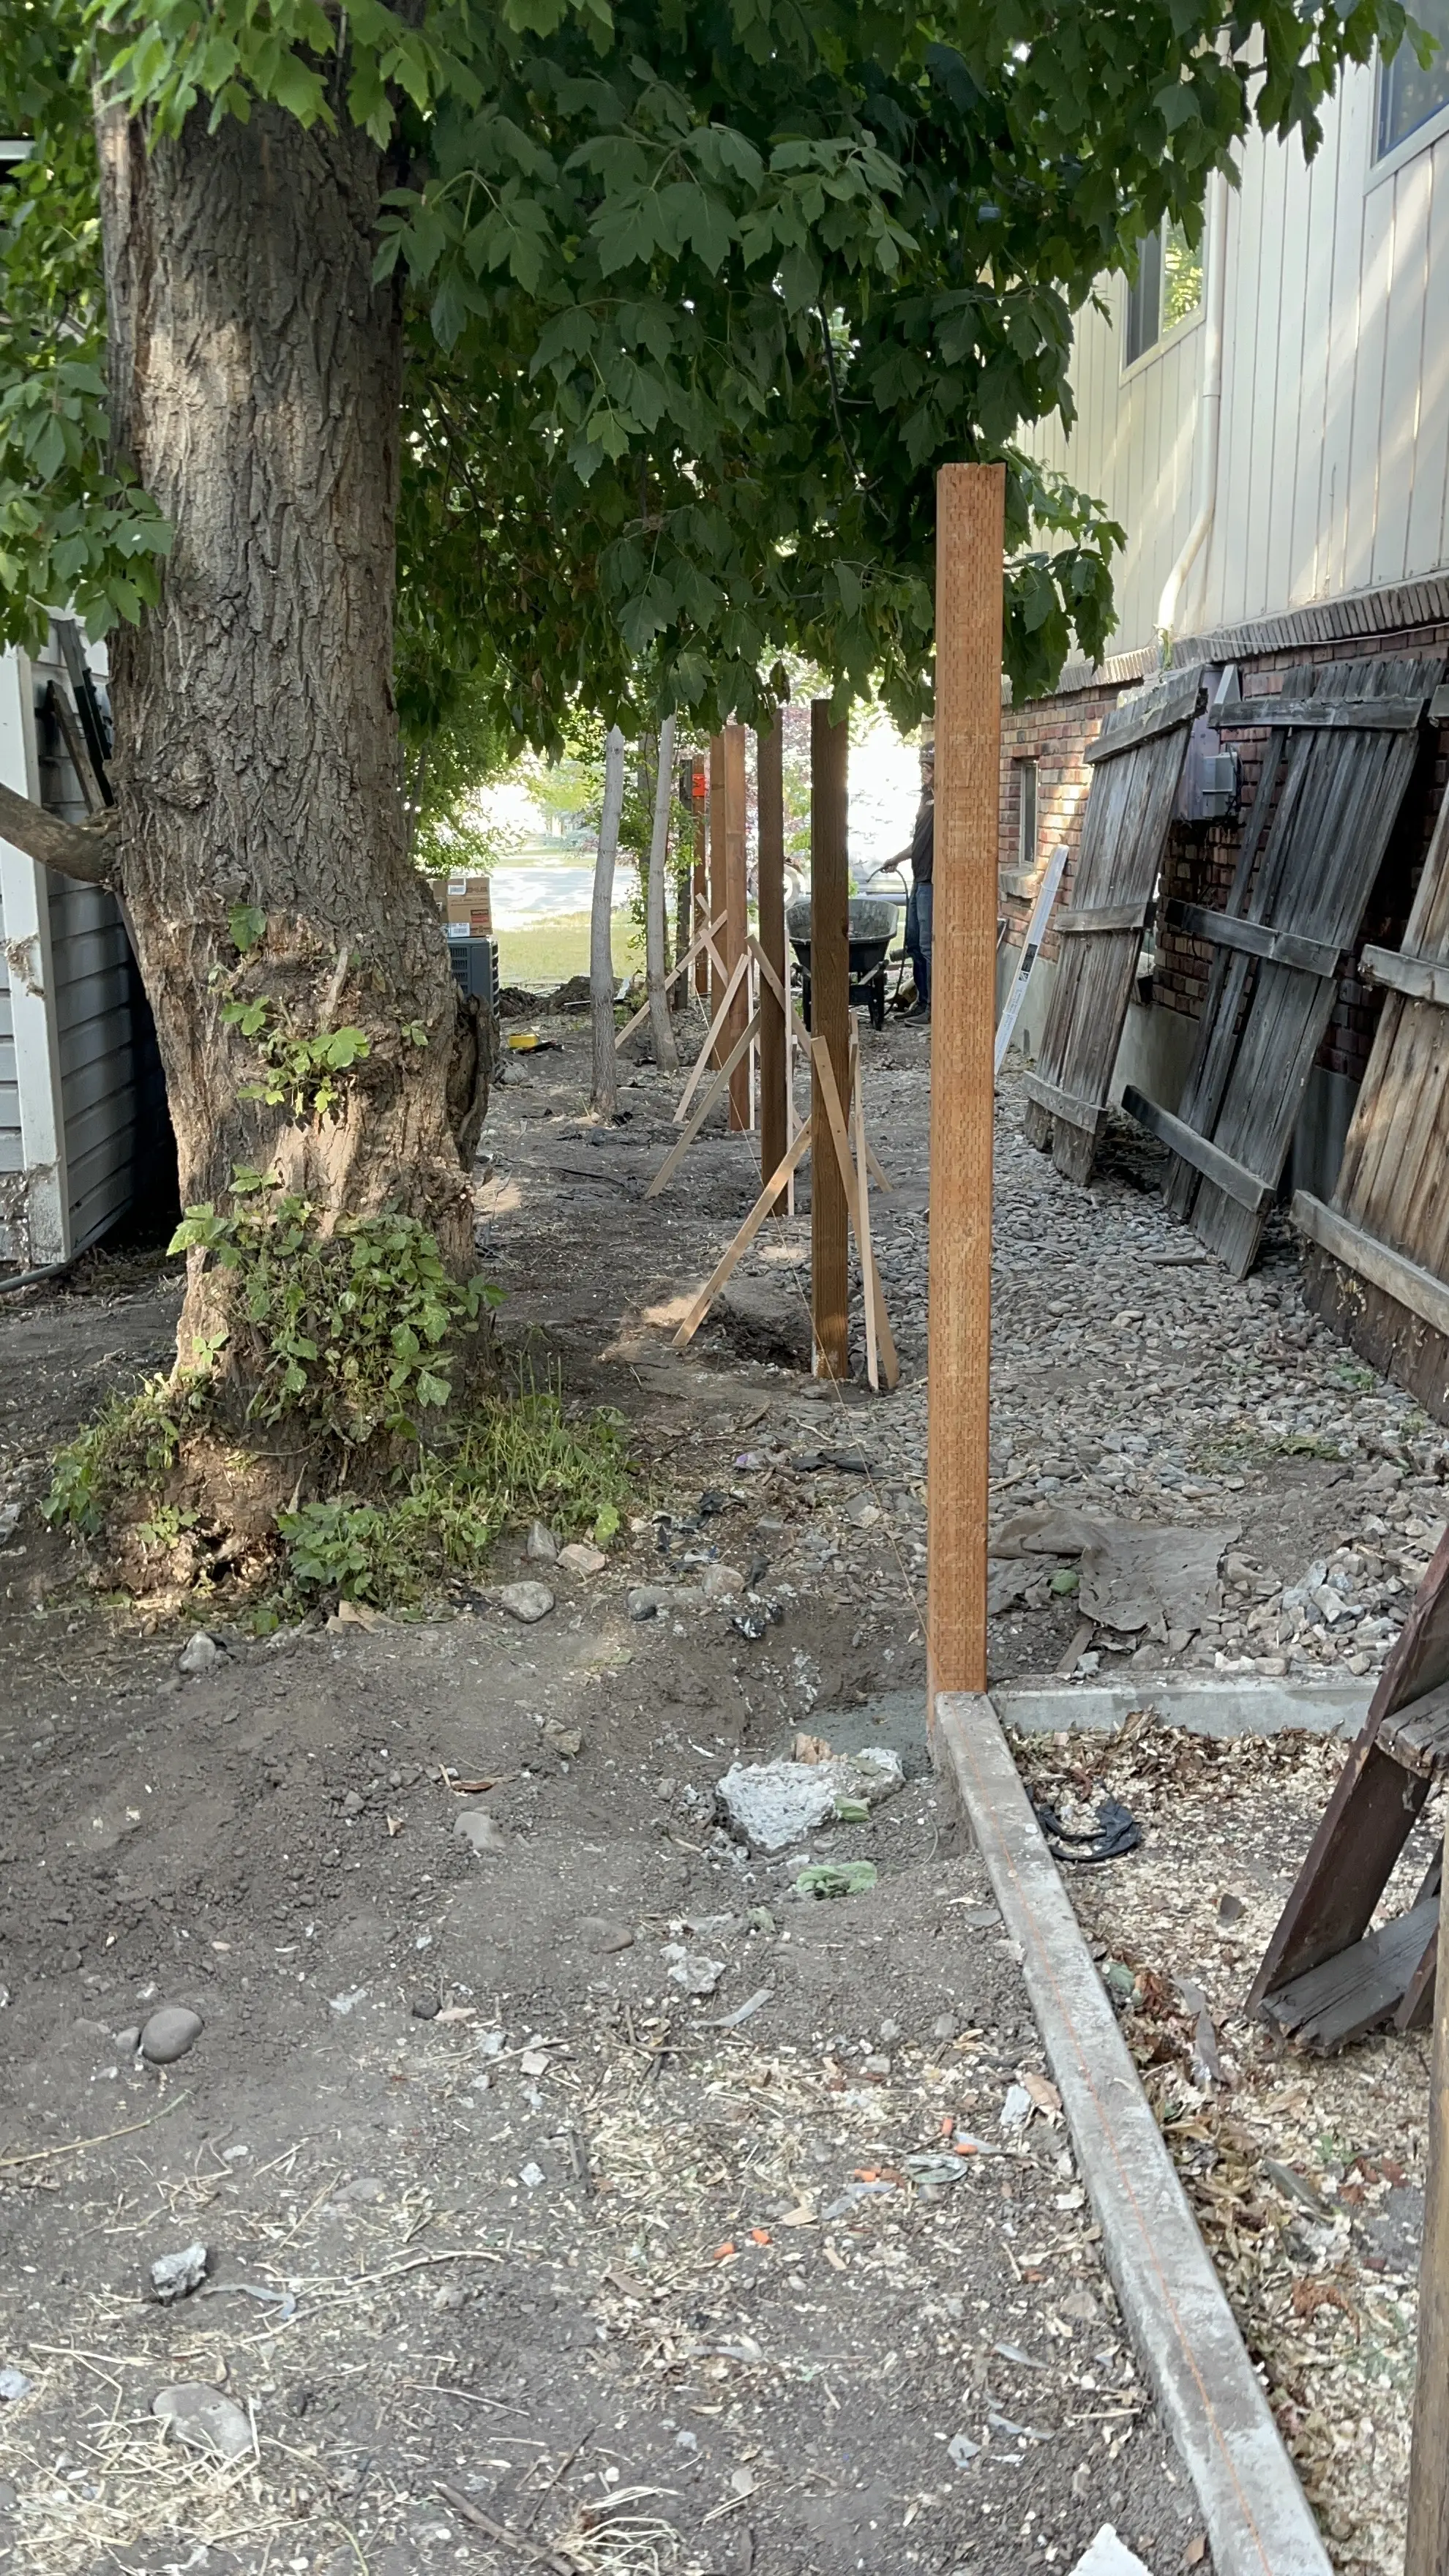
A sprayer is a production tool, not a shortcut around prep. Mask windows, fixtures, roof edges, concrete, landscaping, and customer property before spraying. Test the pattern on cardboard, check for tails, and overlap passes consistently so the coating builds evenly. For exterior or larger repaint planning, a walkthrough through our estimate request page is usually faster than trying to price it from a materials list alone.
Cleanup is part of the job. Leaving paint in a sprayer, hose, filter, or tip creates equipment problems that slow the next crew down and can ruin a finish.
Paint Sprayer Setup
Watch how pressure, tip choice, and test patterns are adjusted before spraying the actual surface.
Exterior Masking
Focus on how overspray is controlled before spraying begins, not cleaned up afterward.
Airless Technique
Watch the distance from the surface, overlap, trigger timing, and consistent movement.
Cleaning a Paint Sprayer
Pay attention to the order of flushing, filter cleaning, and storage so the sprayer works on the next job.
Large repaint, exterior masking, or sprayer project? Request a painting estimate.
Module 4
Quality Control
Core Skills
- Identifying missed spots
- Touch-up
- Final walkthrough procedures
Key Takeaways
- Inspect from the customer viewpoint: entries, windows, stairs, and natural light.
- Acceptable means it passes basic standards; excellent means it looks intentional.
- Self-inspection protects the schedule, the review, and the next job.
Quality control is about seeing the room after the tools are out of your hands. Look for missed edges, roller skips, paint on hardware, tape bleed, rough patches, drips, and inconsistent sheen. Use side lighting when needed, especially over drywall repairs. This is the kind of detail that separates a quick paint job from a reliable home improvement service.
Before the customer walkthrough, clean the space, pull trash, reinstall plates and registers, stage touch-up paint, and check the room from normal standing height. Customers notice corners, trim lines, outlet covers, floors, and whether the crew respected their home.
Final Walkthrough Checklist
- All walls have full coverage with no holidays or lap marks.
- Ceiling and trim lines are clean.
- Drywall repairs are hidden under normal lighting.
- Floors, counters, fixtures, and hardware are free of paint.
- Trash, tape, plastic, and dust are removed.
- Customer knows what was done, what is still curing, and how to contact us for concerns.
Module 5
Ladder and Jobsite Safety
Core Skills
- Step ladder setup
- Safe climbing practices
- Three points of contact
- Proper ladder angle
- Moving ladders safely
- Working at heights
- PPE use
Key Takeaways
- Falls are the biggest painting hazard.
- Speed should never override safe ladder positioning.
- Know when the job requires scaffolding, planks, or a different access plan.
Most painting injuries are preventable. Keep ladders level, fully open, and close enough to the work that you are not leaning out past the rails. Maintain three points of contact while climbing, move the ladder instead of stretching, and keep drop cloths, cords, hoses, and paint buckets out of walking paths.
PPE depends on the task: eye protection for scraping and spraying, respirators when ventilation or coating type requires it, gloves for solvents and cleanup, and footwear that stays stable on ladders.
Ladder Safety
Focus on ladder placement, three points of contact, and moving the ladder instead of overreaching.
Scaffolding Basics
Watch for level setup, platform safety, guardrails, and when scaffolding is safer than stretching from a ladder.
Module 6
Professionalism and Customer Experience
Core Skills
- Communicating professionally
- Working in occupied homes
- Daily cleanup
- Respecting customer property
- Explaining timelines
- Handling complaints calmly
- End-of-job walkthroughs
Key Takeaways
- Trust is built through clean work habits, clear updates, and calm problem solving.
- Daily cleanup matters because customers live with the job before they see the final result.
- Reviews and referrals usually come from the whole experience, not just the paint color.
Painting in an occupied home means the customer is sharing their space with the crew. Keep tools organized, protect walking paths, communicate when rooms will be unavailable, and never assume furniture, decor, pets, or personal items are okay to move without a plan. That same standard applies across our broader handyman work in Utah County, not just paint projects.
For internal training, this module is best taught through roleplay, shadowing experienced crew leads, and reviewing real examples from A Team jobs. For homeowners, this is what you should expect from any contractor: respect, clear expectations, and a jobsite that feels controlled.
Professional Habits That Customers Notice
- Arriving when promised or communicating quickly when the schedule changes.
- Using clean drop cloths, straight masking, and organized tool areas.
- Explaining what was completed each day and what happens next.
- Listening first when a customer points out a concern.
- Ending with a walkthrough instead of disappearing after cleanup.
Want a crew that follows this process? Schedule a visit.
Q&A
Common Painting Questions
Is this enough to paint a room myself?
For a simple bedroom with minor patching, yes, this is a good roadmap. If the room has heavy drywall damage, tall stairwells, cabinet-grade trim, water stains, or tight move-in timing, it is usually worth getting a professional quote for interior painting.
Should drywall repair happen before painting?
Yes. Patching, sanding, texture matching, and spot priming should happen before finish paint. If the repair is larger than a few nail holes, start with the drywall repair guide or ask A Team to evaluate it before paint is purchased.
What is the most common reason a paint job looks amateur?
Rushed prep. Dirty walls, unprimed patches, poor caulking, overloaded brushes, dry rolling, and skipped inspection all show up after the paint dries. Good paint helps, but process matters more.
Do you offer this as a service in Utah County?
Yes. A Team handles painting, drywall repair, trim, punch lists, and related prep work in Provo, Orem, Springville, Spanish Fork, and surrounding Utah County areas. The fastest next step is to send project details or request an estimate.
When to Hire a Painter Instead of DIY
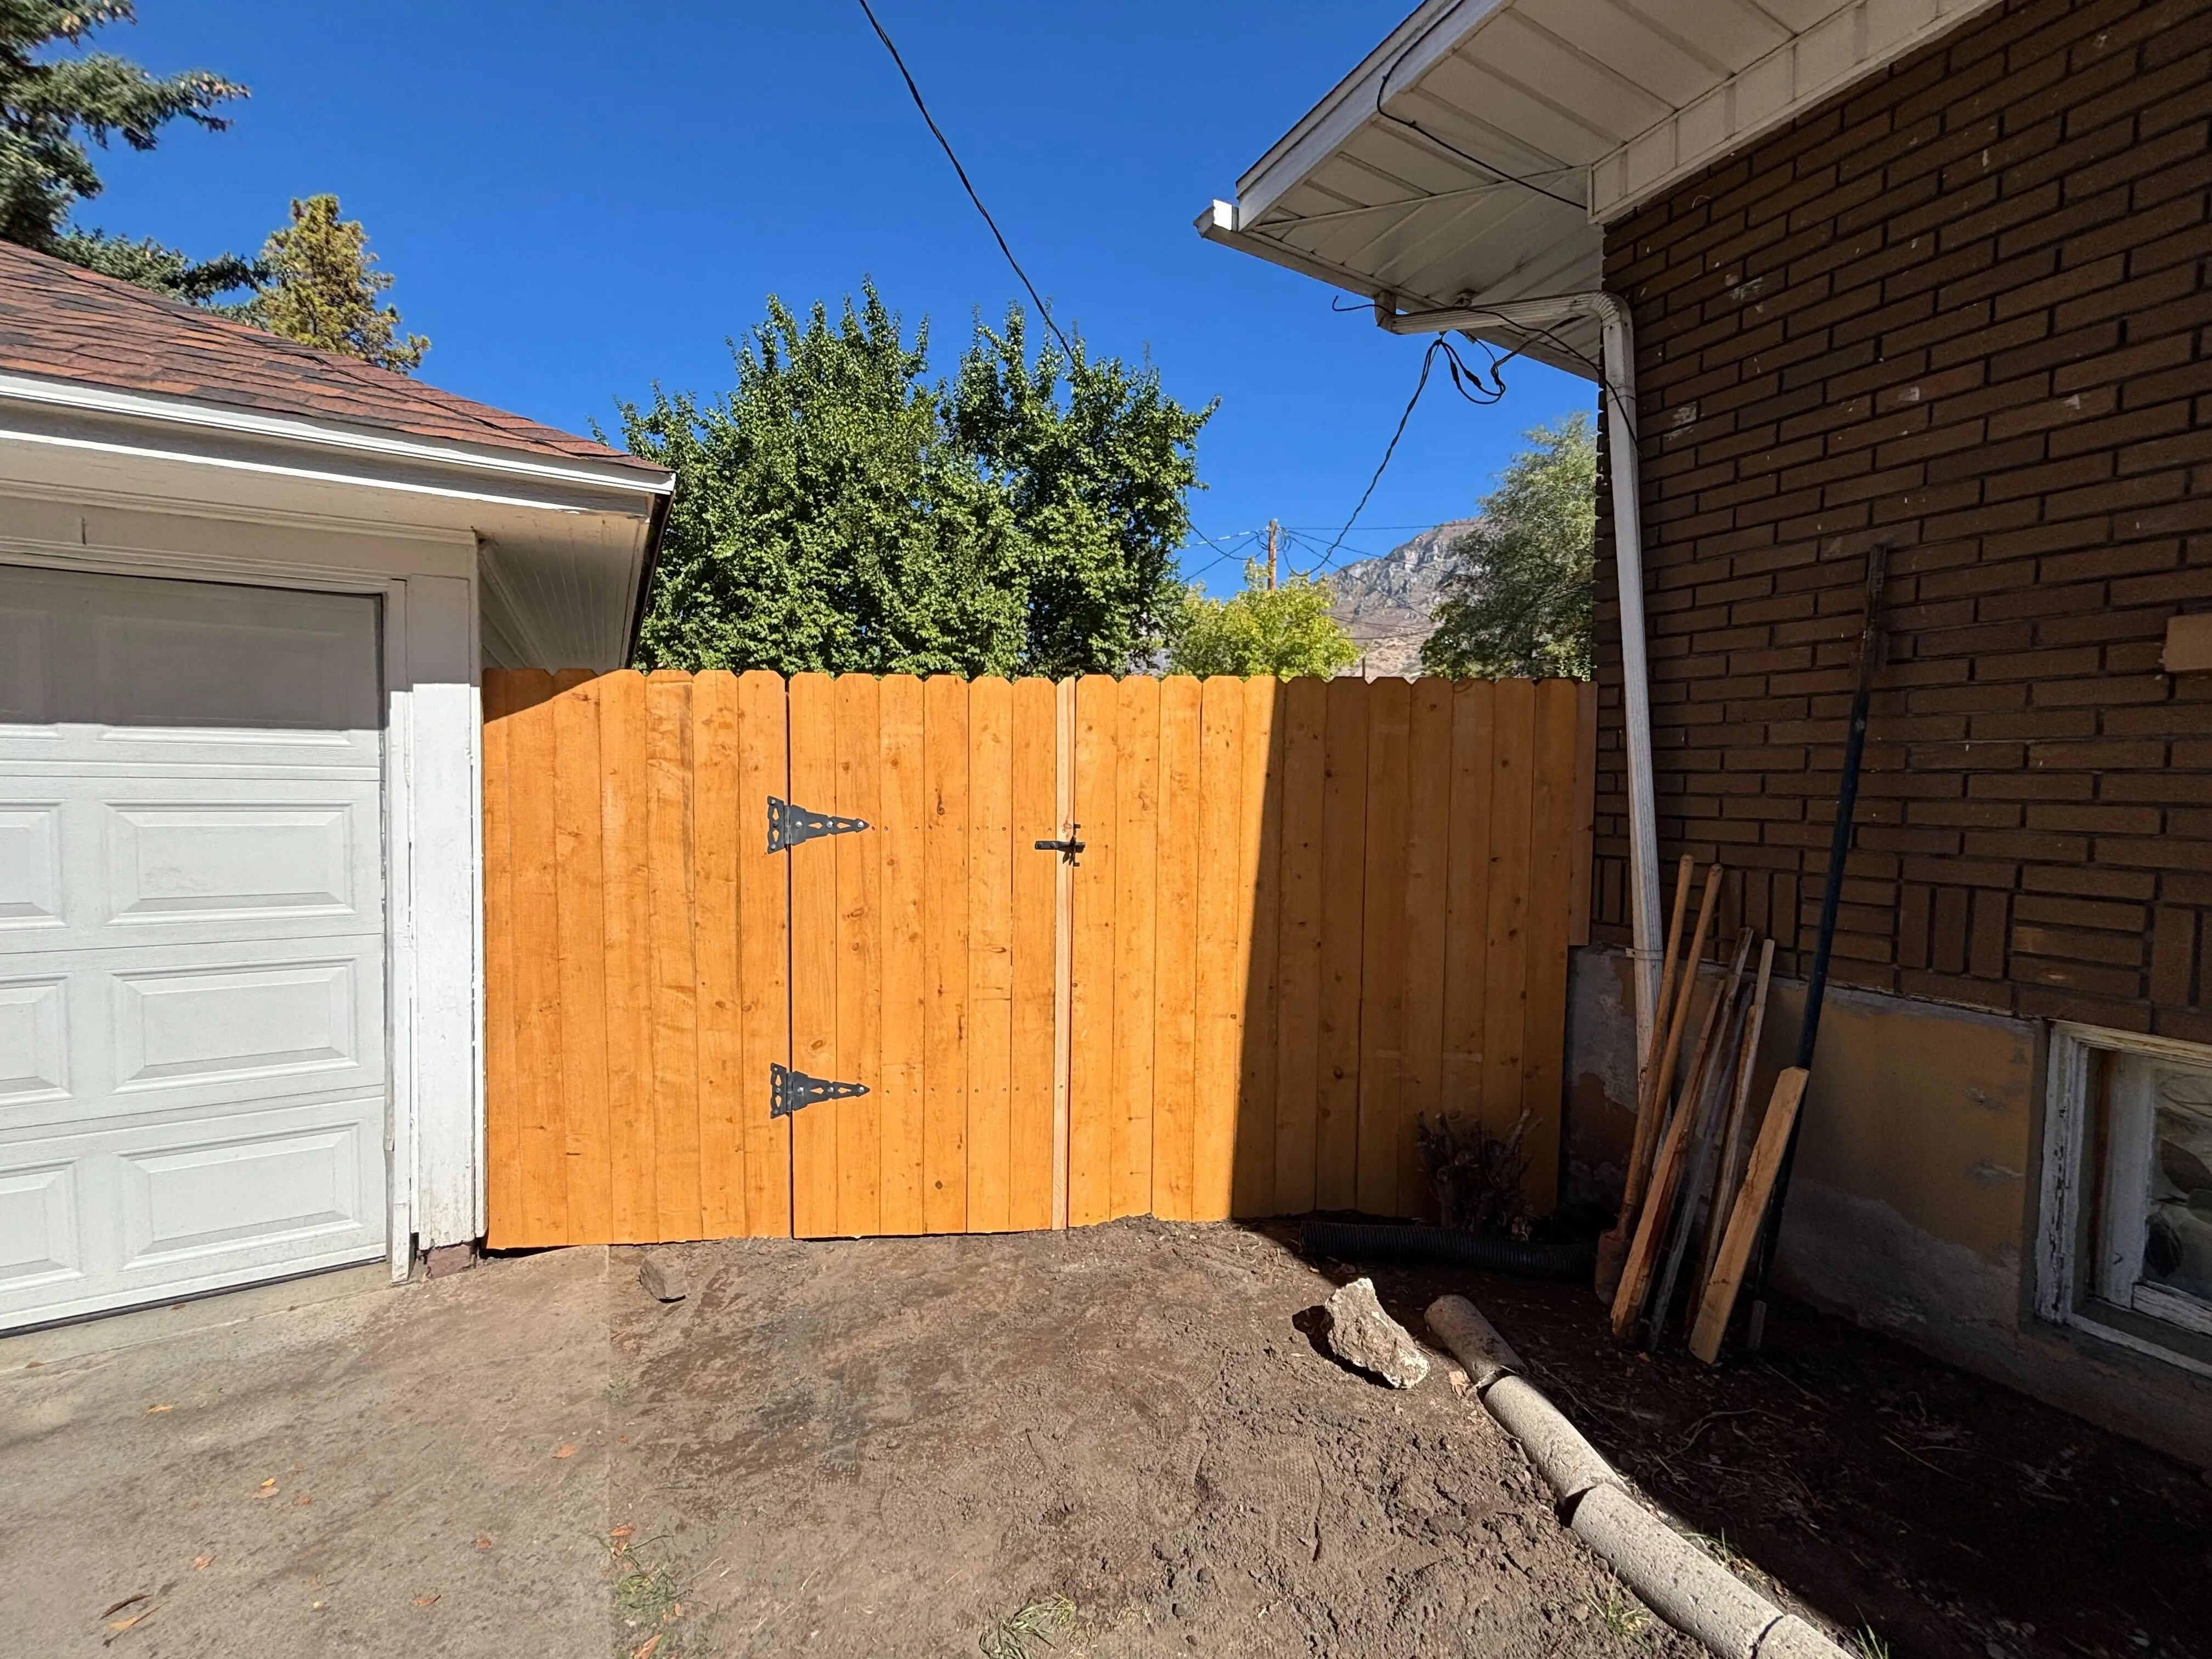
Consider hiring a professional if the room has heavy drywall damage, tall stairwells, stained ceilings, cabinet-grade trim, tight deadlines, occupied-home constraints, exterior masking, or a finish that needs to look consistent under natural light. These are the jobs where prep, access, product choice, and final inspection matter more than simply getting paint on the wall.
We can help with interior painting, drywall repair, trim, exterior masking, and full repaint planning.